Casting your own silicone toy
From printed mould to finished toy. For adults (18+). Every fact links to where it comes from.
Read this first. Nothing in this guide or in the tool proves that a home-made toy is safe for use on or in the body. Skin-safe silicone, a clean mould and a good cure make it likelier, not certain. You choose the materials and you carry the risk. Sources for each claim: see the end.
- The process at a glance
- What the tool does today
- Two real casts, in photos
- Choose the silicone
- Print the mould
- Prepare the mould
- Mix and pour
- Cure and demould
- Clean, store, use
- Materials and links
- Privacy and terms
- Sources
The process at a glance
- Design. Draw the profile (thickness along the length) and the path (the line it follows). Fix anything the Checks panel marks. Start from a template if you like, or press Randomizer for a surprise. Texture puts a relief over part of the length.
- Render. Press Render, then download the two mould halves as STL or 3MF, and the print sheet. It lists how much silicone and filament you need.
- Print the halves on your printer. Print the mould
- Prepare the halves: clean, seal, release agent, do a test patch. Prepare the mould
- Mix and pour the platinum silicone, slowly, from the base opening. Mix and pour
- Cure and demould. Wait the full time before you open the mould. Cure and demould
- Clean, store, use. Wash it and let it dry before the first use. Clean, store, use
What the mould looks like
Each part is explained on mould basics.
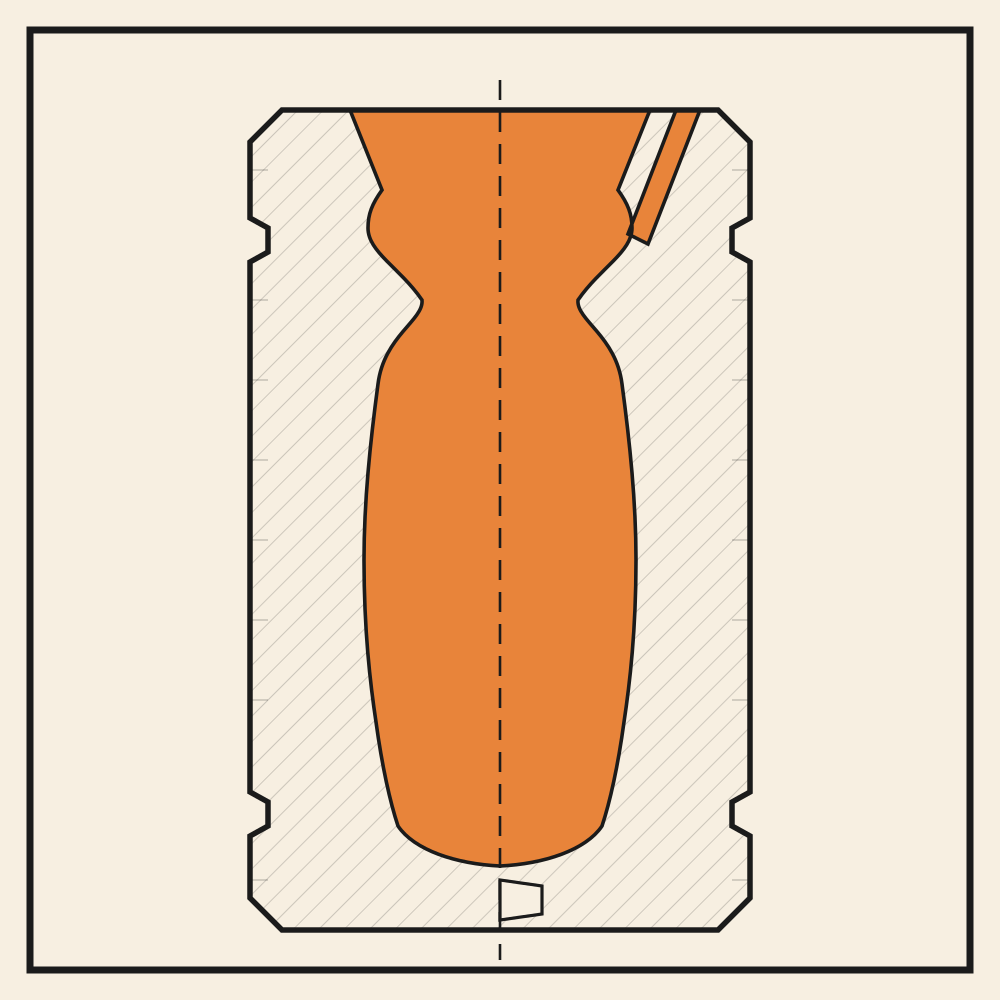
Cut down the middle, closed and ready to pour. Orange is the space the silicone fills.
- The funnel in the top face is the base of your shape. The shape stands on its head, tip down.
- The vent is the thin channel leaving the widest corner and going out of the top. Trapped air leaves there.
- The dashed line is the parting line: the two halves split along it.
- The pin crossing that line is one of six. They only let the halves close one way.
- The grooves in the sides hold the rubber bands.
- The pry slots (not drawn) cut across the joint at the corners. A screwdriver or a coin in one opens the mould.
Simplified. The real block is hexagonal outside, and the pins and vents sit where your design needs them.
What the tool does today
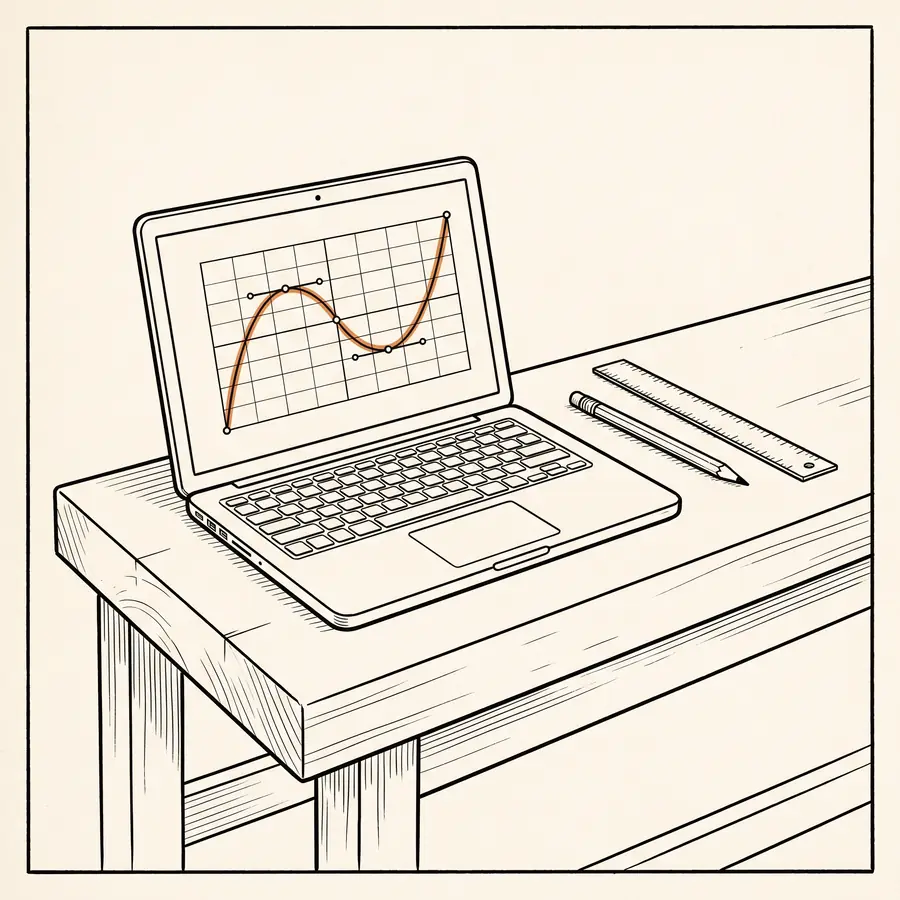
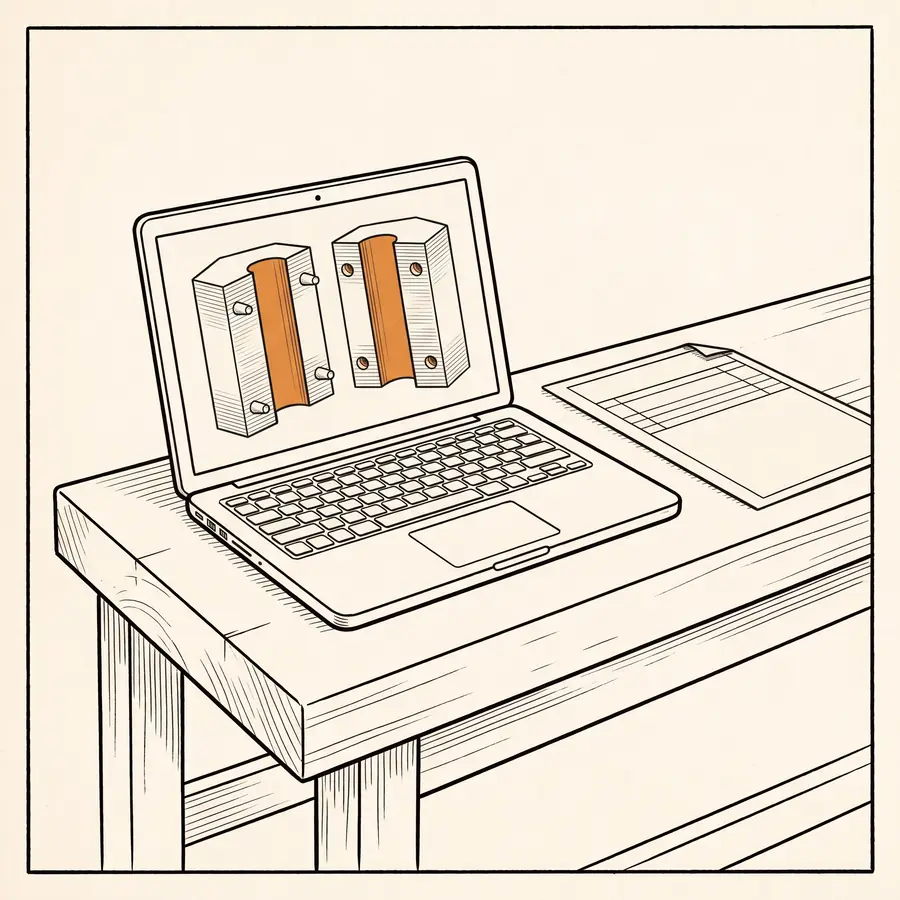
You draw the shape with two drawings: the profile (thickness along the length) and the path (the line it follows). Straighten and Smooth on the path, Surface on the profile (waves, ripples, sawtooth, Smooth, Simplify) and Scale (width and height by a percent) save hand work. Randomizer makes a new design from dice, and Undo brings yours back. In the preview you pick a colour or a base-to-tip gradient; that is for your eyes and does not change the print.
Texture. The Texture button lays a relief over part of the length. Choose from seventeen patterns: pimples, spikes, bumps, balls, grooves, pyramids, diamonds, hexagons, woven, diagonal ridges, veins, scales, wrinkles, leather, warts, coral, tentacle suckers. Sliders set the height (0.2 to 6 mm), the tile (the size of one repeat, up to 100 mm), where it starts and ends and how it fades in. Stretch spreads the pattern wider round the body (fewer repeats, wider lines and veins). Twist leans it so lines run at an angle or follow a curve. Spin turns the pattern round the body. Mask hides a slice of it (Mask fade softens its two edges so the pattern blends out), leaving 360 minus the Mask degrees showing from the Spin point; the slice turns and leans with the pattern, so Spin and Mask together isolate a single vein. With a very wide Stretch the pattern gets less than one repeat round the body and shows a seam, which Mask can hide. Rotate turns it in quarter turns and Invert sinks a raised pattern. Every number in the tool is a slider (Surface, Scale and Texture); only the length and the printer volume are typed. You see it live; Apply keeps it, Cancel (or Esc) puts it back. The panel stays open when you click elsewhere. The relief is carried into the object files and into the mould, so the cast comes out textured. Fine detail is hard to print and to pull out of silicone: the tool flags anything smaller than 1 mm, and deep or sharp patterns (spikes, coral) are the ones to demould slowly. This is my advice, not a tested figure: try a small piece first. Each mould half has the name and size engraved on the outside.
Flatten. Near the bottom right of the preview sits a small toolbox with Flatten, Texture and Scale. Flatten cuts a flat chord into one or more sides of the round cross-section: Top and Bottom are the two sides in the plane of the path (front and back), Left and Right the two sides out of it. Tick one, two or all four; the Amount slider sets how deep the cut goes, shared by every side you ticked; Start, End and Fade zone it along the length the same way as Texture. It never cuts past a 5 mm radius. Flatten runs before Texture, so a relief such as the tentacle suckers sits on the flat bed rather than on the round body. Apply keeps it, Cancel (or Esc) puts it back, same as Texture.
You draw the shape, check it, and download the object as STL or 3MF. The tool also tells you how much silicone to mix. Press Render and it designs a two-piece mould around your shape: a hexagonal block split along the centre line, with pins so the halves close one way, grooves for rubber bands, pry slots to open it, and vents where air could be trapped. Download the two STLs and print them. The steps from "Choose the silicone" onward apply to that mould, or to any mould you make yourself.
The size limits in the checks (5 mm radius minimum, 4 mm opening, 3 mm wall) are working defaults, not tested figures. They will be replaced by measured ones after a real print-and-cast run.
Two real casts, in photos
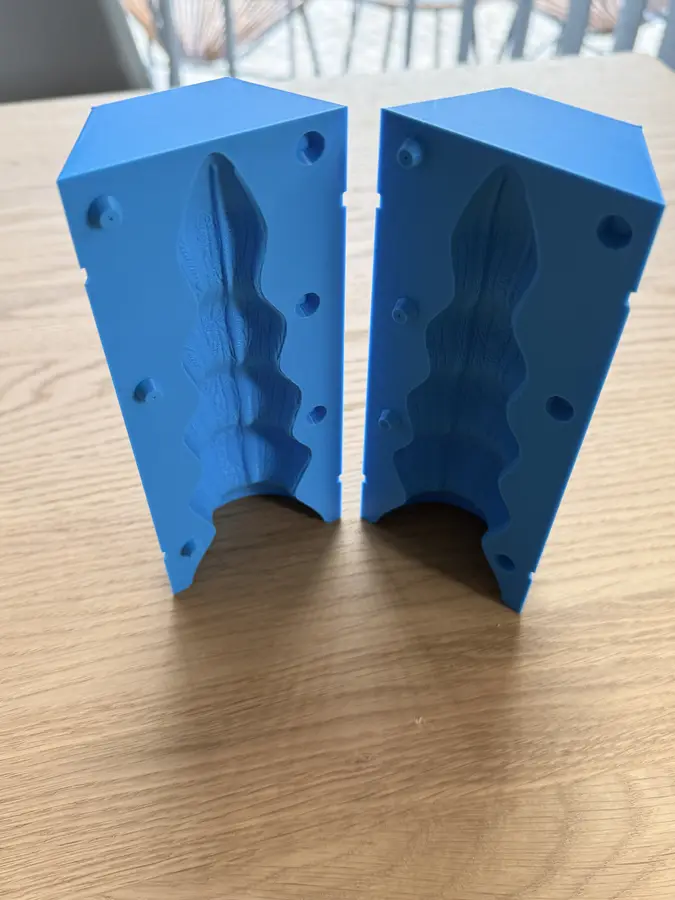
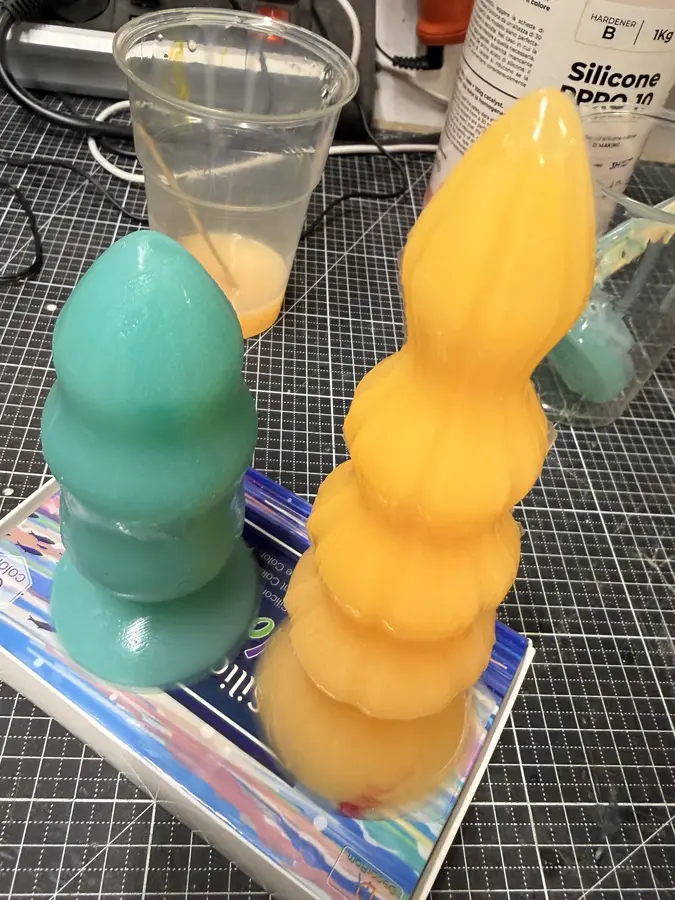
Two toys the author cast from moulds this tool made, in Reschimica RPRO 10, a shore 10 platinum silicone. Your silicone and your steps may differ; the sections below have the sources.
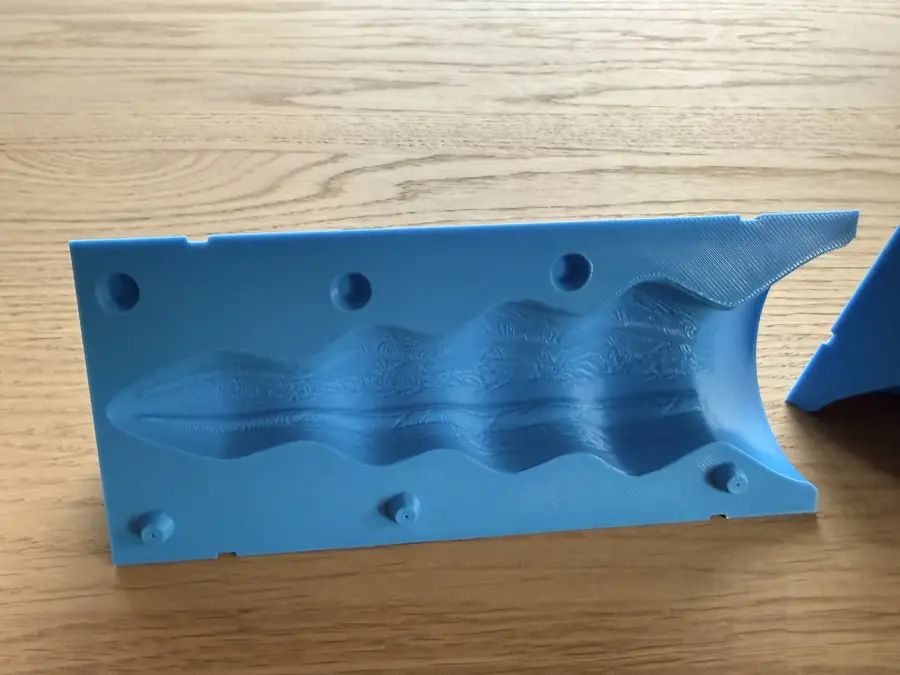
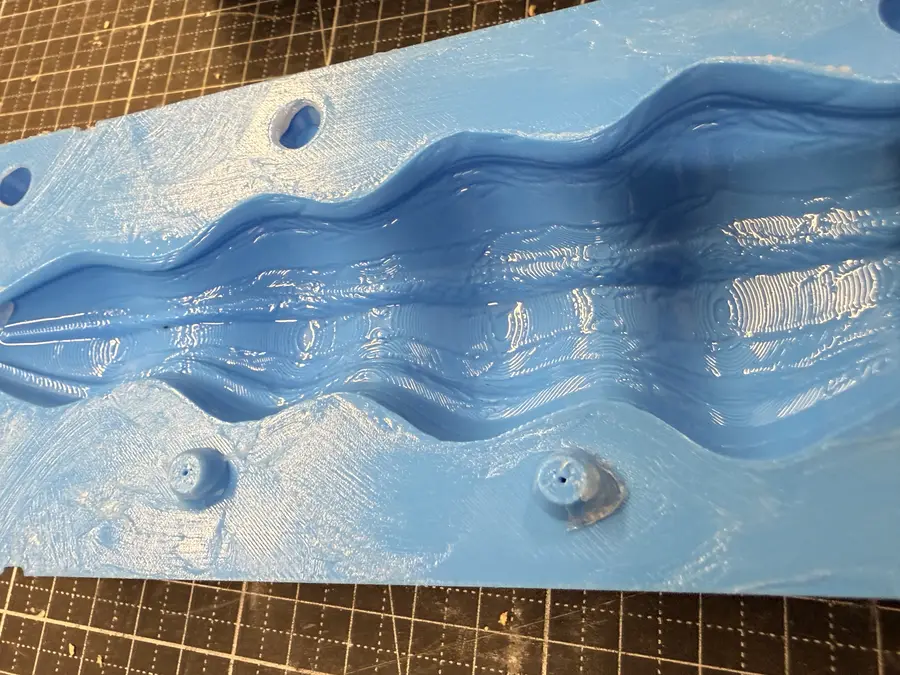
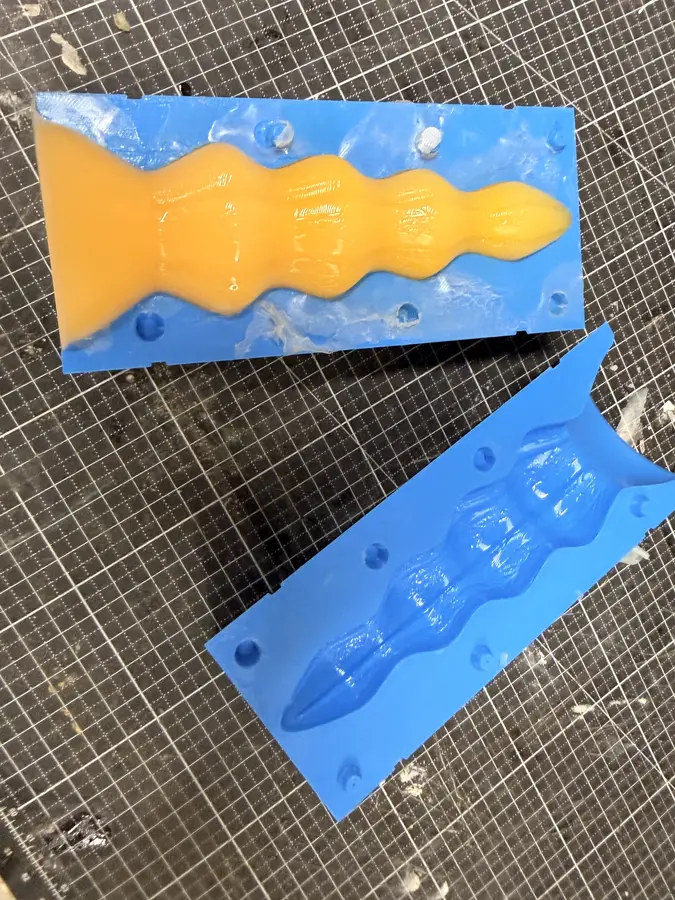
The mould, as printed. Two halves, pins on one, sockets on the other.
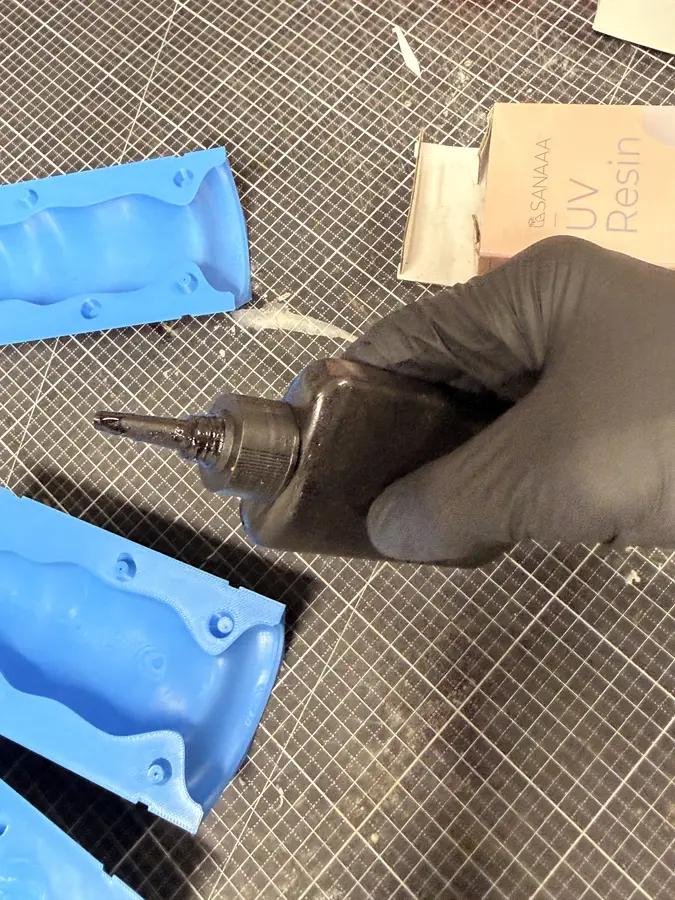
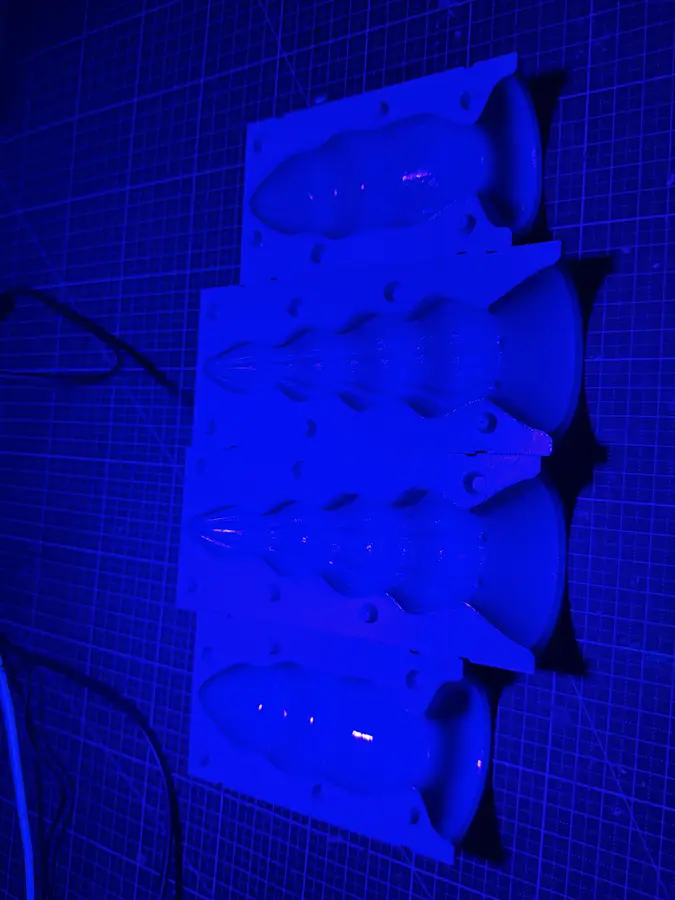
Coat the inside with UV resin, thin and flat, and harden it under a UV lamp. It hides the layer lines and seals the print.
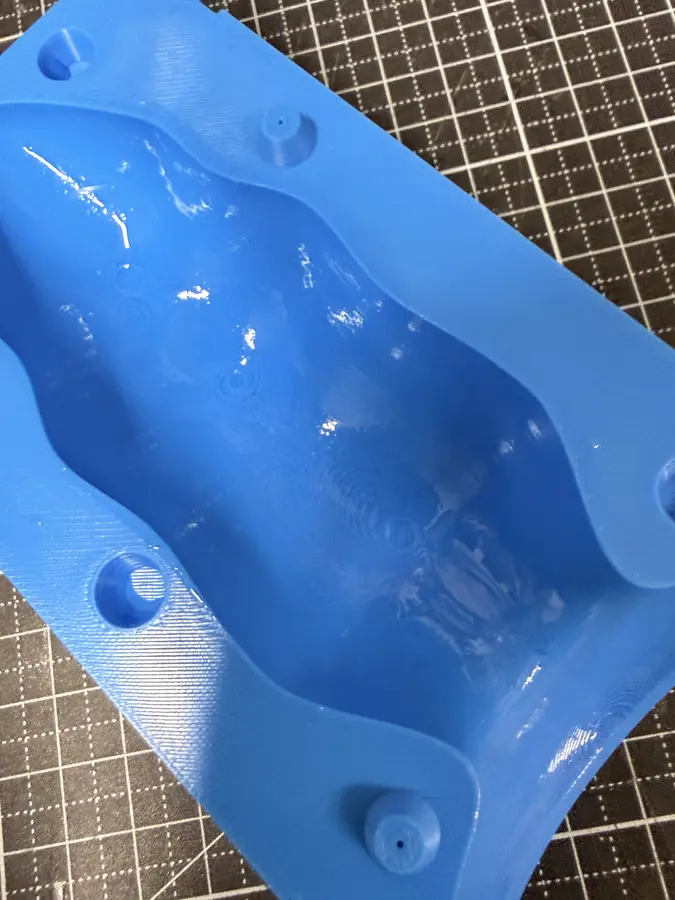
Smear petroleum jelly (Vaseline) on the flat faces where the halves meet. It seals the joint so the silicone does not leak out. Keep it out of the hollow.
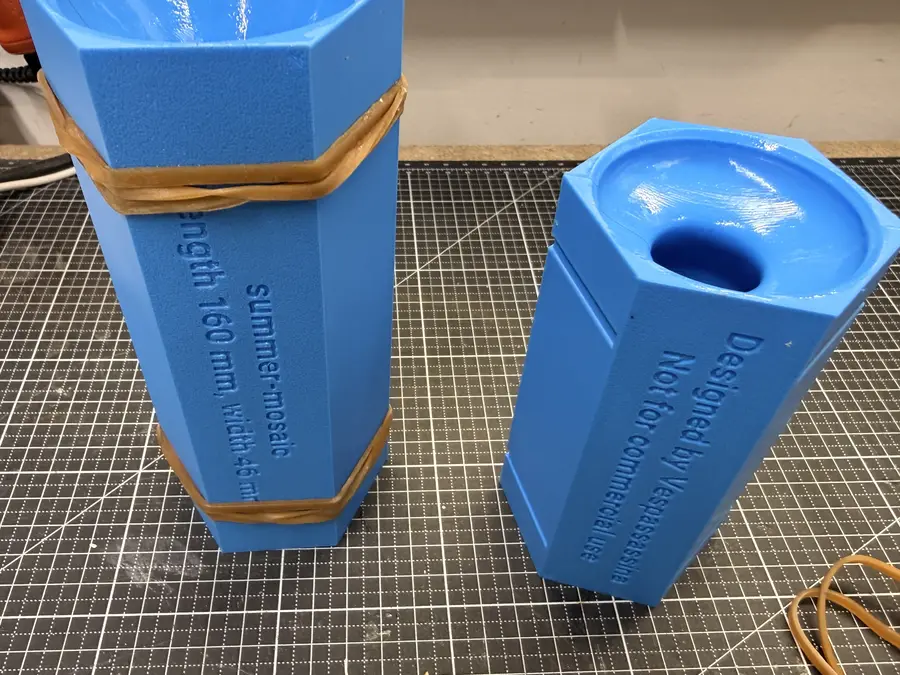
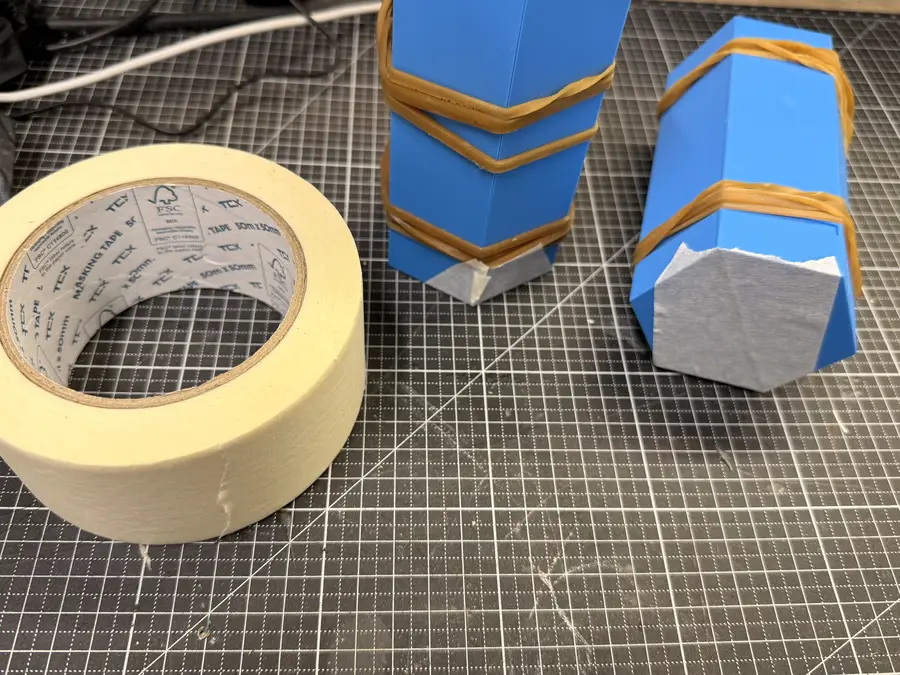
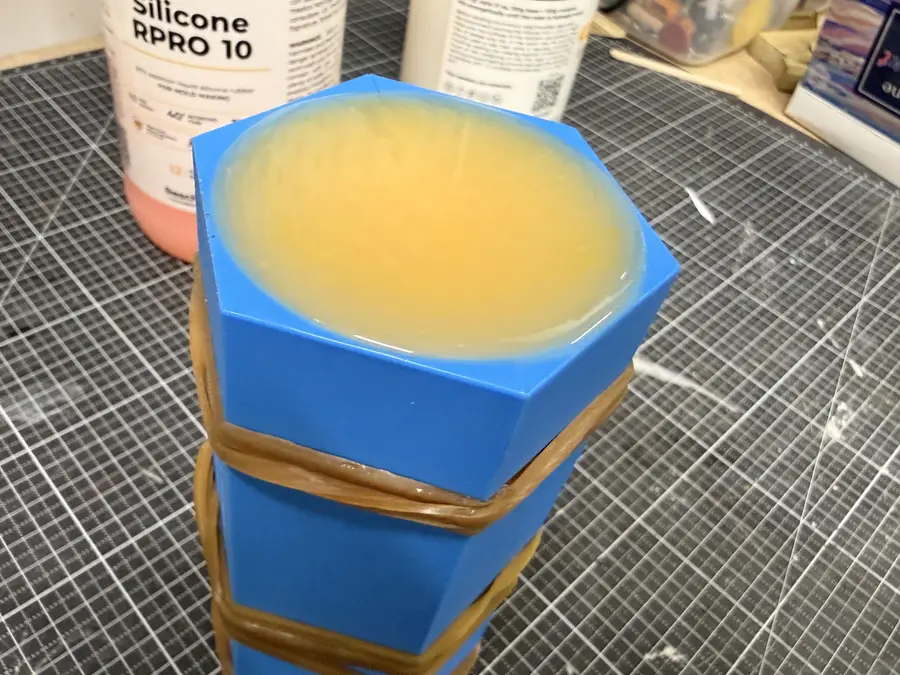
Close the mould, put rubber bands in the grooves, and tape over the vent at the bottom.
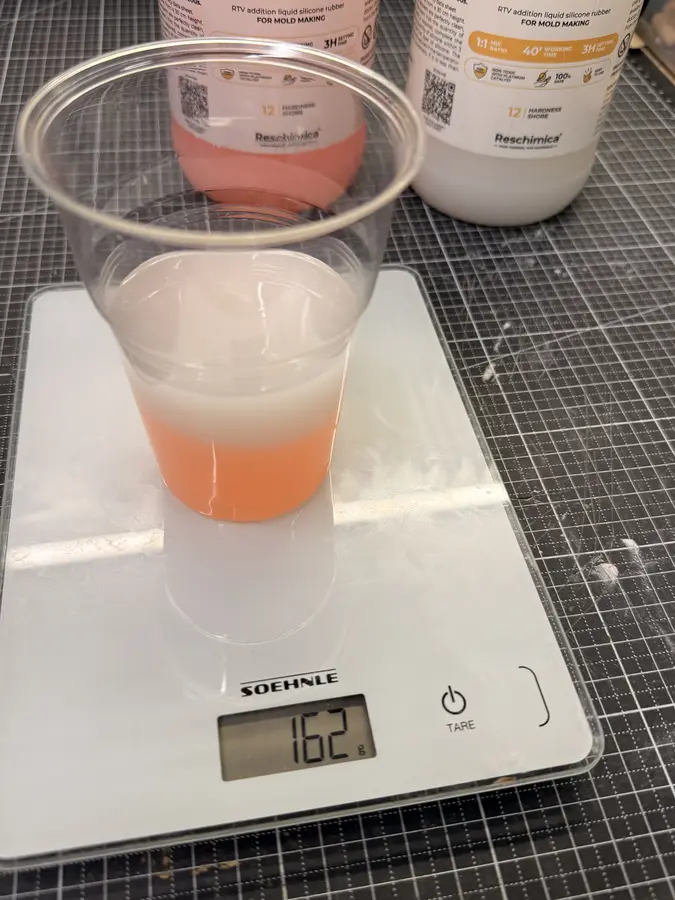
Weigh part A and part B on a kitchen scale, to the figure the tool gives, then stir in a few drops of silicone colour.
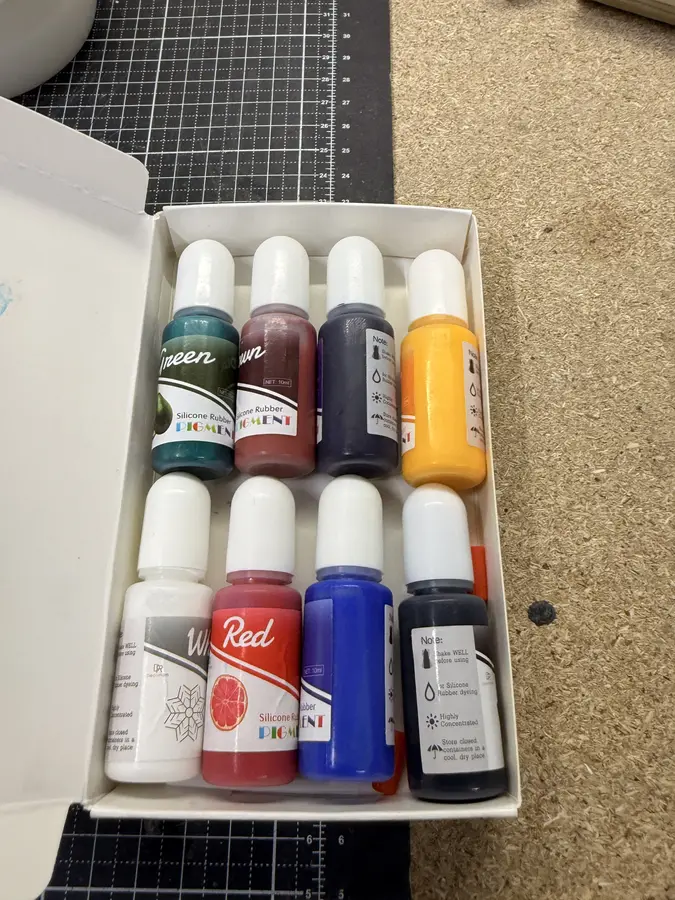
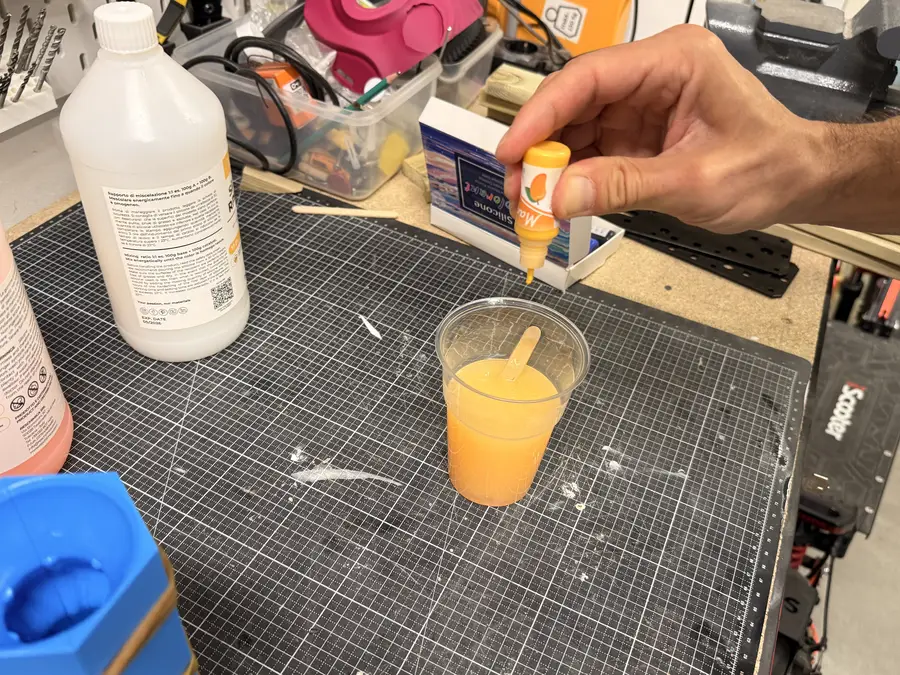
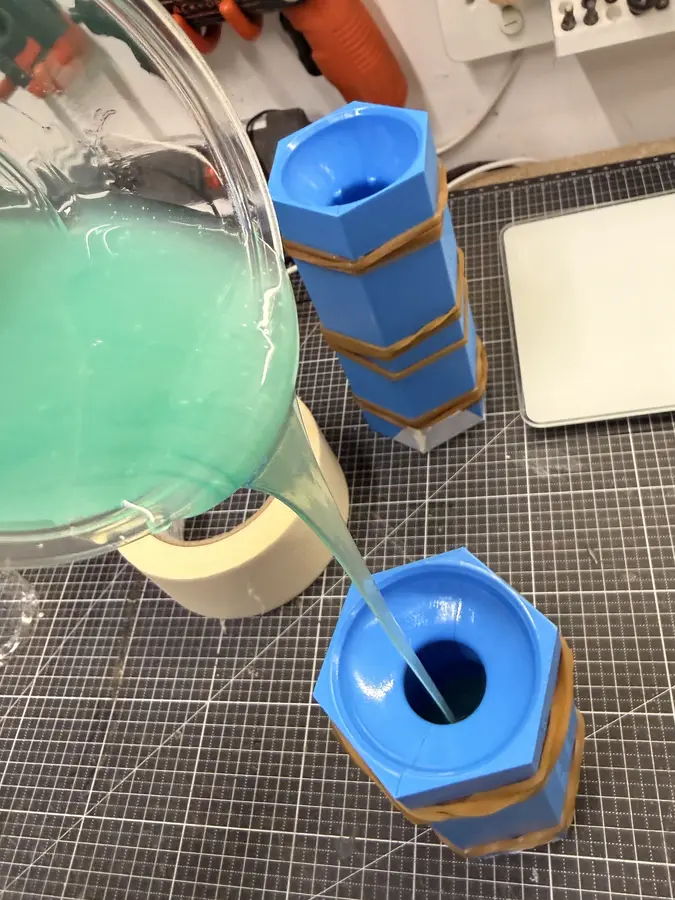
Pour slowly, in a thin stream from high up, into the funnel.
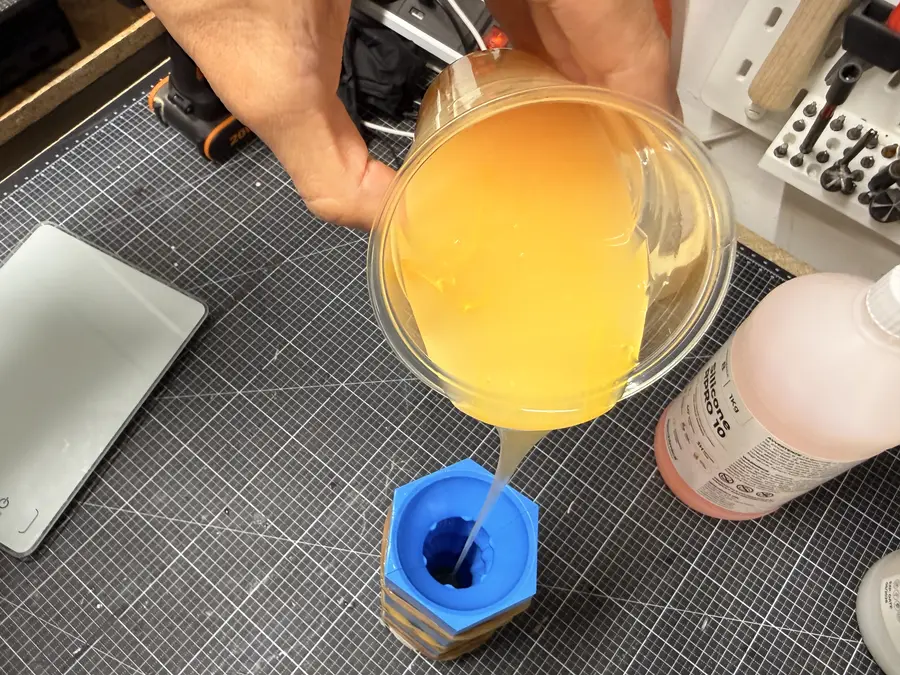
Leave it alone for 24 hours.
Take off the bands and pull the halves apart. These moulds had no pry slots and were hard to open; the designer now cuts pry slots, for a screwdriver or a coin.
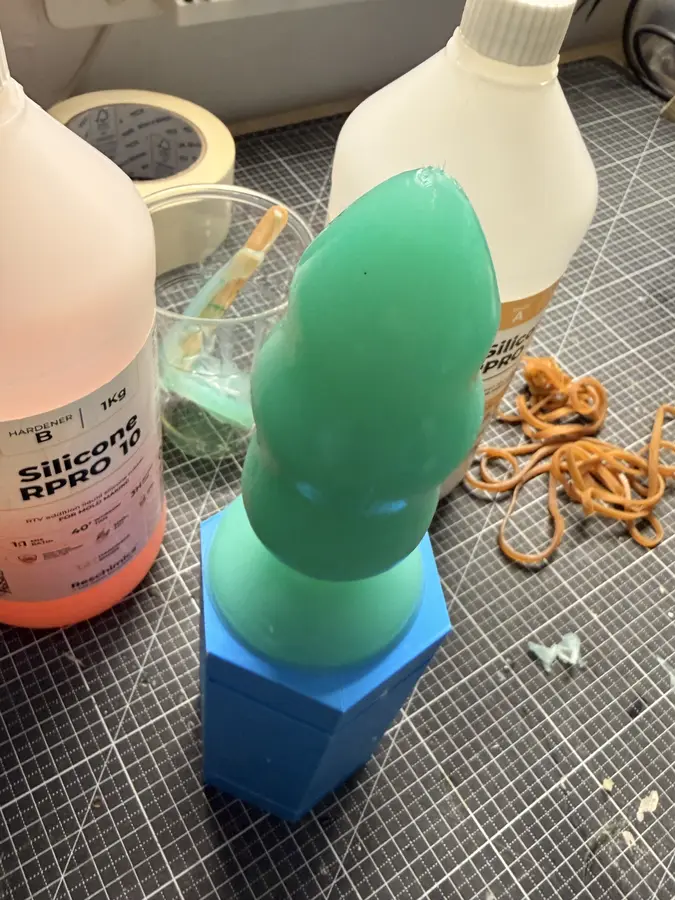
Done. Wash with dish soap to take off the petroleum jelly and any oil.
Choose the silicone
The short version is below. The long one, with what every label on the tin does and does not certify, is on which grades are body-safe.
- Platinum cure, not tin cure. The two differ in the metal that starts the cure. Platinum types shrink less and keep for decades; tin types cost less. [Smooth-On FAQ 184]
- "Skin safe" is not "body safe". Smooth-On calls cured Ecoflex 00-30 and Dragon Skin 10 skin safe by an independent lab, gives no warranty, and leaves suitability to you. [FAQ 205] No page we read says such a grade is safe on mucous membranes, so this guide does not say it either.
- Read the labels carefully. USP Class VI is three animal tests on the material, pass or fail. It does not judge a finished device. [Elastostar] The US rule 21 CFR 177.2600 covers rubber for repeated food contact, not the body. [Cornell LII] Smooth-On itself says complying with it is not FDA approval. [FAQ 126]
- The trade runs on trust. "Body safe" often means only what the maker says, so ask for third-party test reports. [Dame] Pigments need their own tests. [SSP]
- Softness. Shore 00 is softer than A, and A softer than D. [Smooth-On] Dragon Skin 10 is Shore 10 A; Dragon Skin 30 is 30 A; Ecoflex runs 00-10 to 00-50. [DS 10] [DS 30] Pick from the datasheet, not from this page.
- How soft (the author's tip). The author casts in shore 10, finds it soft and likes it, and would not go firmer than 30. That is one person's taste, not a tested figure.
Print the mould
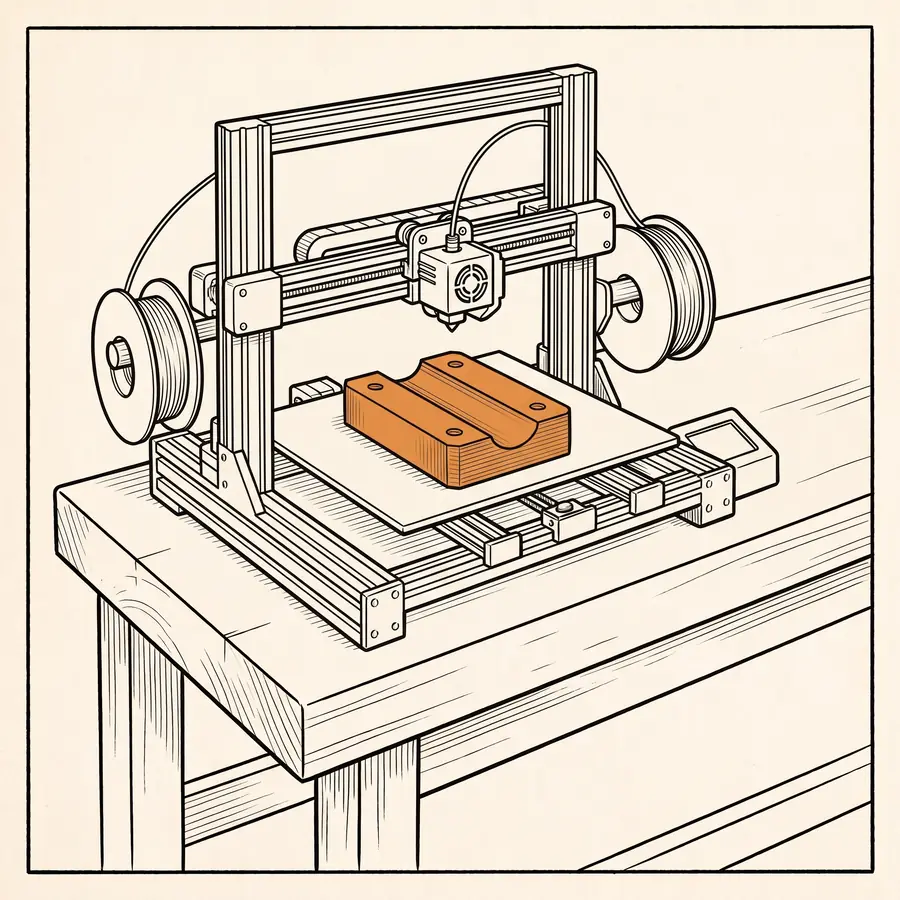
The short version is below. The longer one, with what is sourced and what is not, is on printing a silicone mould.
- Perimeters, not infill, give strength. Prusa: two perimeters minimum, three usual, four for strong parts; 10 to 15 % infill suits most models. [Prusa] [Prusa infill]
- Layer height. Thinner layers show more detail, taller ones show ridges; Prusa advises against going under 0.10 mm. [Prusa] We found no source for a best value, so test on your own printer.
- Layer lines show in the silicone. FDM moulds leave them in the cast. [Sinterit] [Formlabs] Sanding, then a thin coat of UV resin, smooths them and makes the cavity waterproof (the author's method). A filler coat such as XTC-3D fills the ridges and sands smooth. [Smooth-On] Both sources sell competing methods, so treat the size of the effect as theirs.
- Ironing the parting faces. Ironing is a second, slow pass over a flat top surface that smooths it; it does little on curved or sloped surfaces. [Prusa] The halves print with the parting face up, so it suits them. The Mould 3MF does not ask for it; switch ironing on for top surfaces in your slicer if you want it, and check it before you print.
- The seam. Every FDM print has a vertical seam where each perimeter starts and ends. It can be moved, not removed. [Prusa]
- PLA and heat. PLA softens above 60 °C. [Prusa] Keep a PLA mould out of hot ovens and hot cars. We found no source for post-curing a cast in a PLA mould.
Prepare the mould
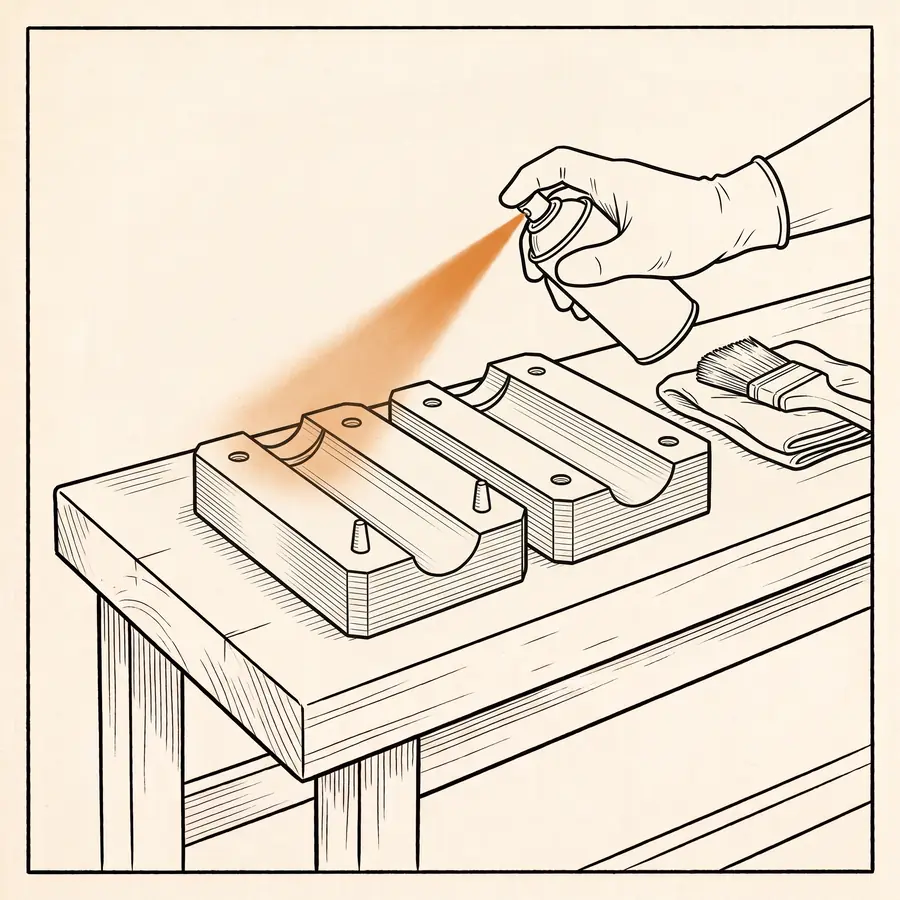
Do these in order: smooth and coat, seal, release agent. Run the test patch (step 1) on the finished surface before the real pour.
- Run a test patch first. Platinum silicone will not cure against some surfaces, and that includes some 3D-printing plastics. [Polytek] Test on a small area: wall it off, pour, wait the demould time, then check for a gummy surface. [Polytek]
- Know what stops the cure. Dow lists amines, sulfur compounds, tin salts and phosphorus compounds. [Dow] Sulfur clay, latex, polyurethane rubber and some paints are named too. [Polytek] Do not use sulfur clay in the mould, and keep tin silicone away from platinum. [FAQ 104]
- Smooth and waterproof the inside (the author's method). After printing, sand the inside of both halves until the layer lines are gone. Then smear a thin, flat coat of UV-hardening resin over the sanded surface and cure it under UV light. The coat fills the layer lines and makes the inside waterproof and very smooth. Sand and coat every half, and keep the coat thin so it does not blur the shape or the pin fit. This step comes from the author's own casting, not from a listed source. Cure the resin fully: an incompletely cured resin surface can stop platinum silicone from curing. [FAQ 210] So run the test patch on the finished coat, not on bare print.
- Seal, then release. A porous print needs a sealer, then a release agent. For PLA and ABS Smooth-On pairs XTC-3D with Ease Release 200. [Smooth-On] Give the sealer at least 30 minutes to dry. [FAQ 104] A sealer may not stop inhibition on its own. [FAQ 104]
- Seal the joint (the author's method). Smear a thin layer of petroleum jelly on the flat faces where the halves meet, not in the hollow. It stops the silicone leaking through the joint. This comes from the author's own casting, not from a listed source. Wash it off the finished toy.
- Go light with the release agent. Too much causes pinhole bubbles. [FAQ 85] No page we read says release-agent residue is body safe, so wash the finished toy well.
Mix and pour
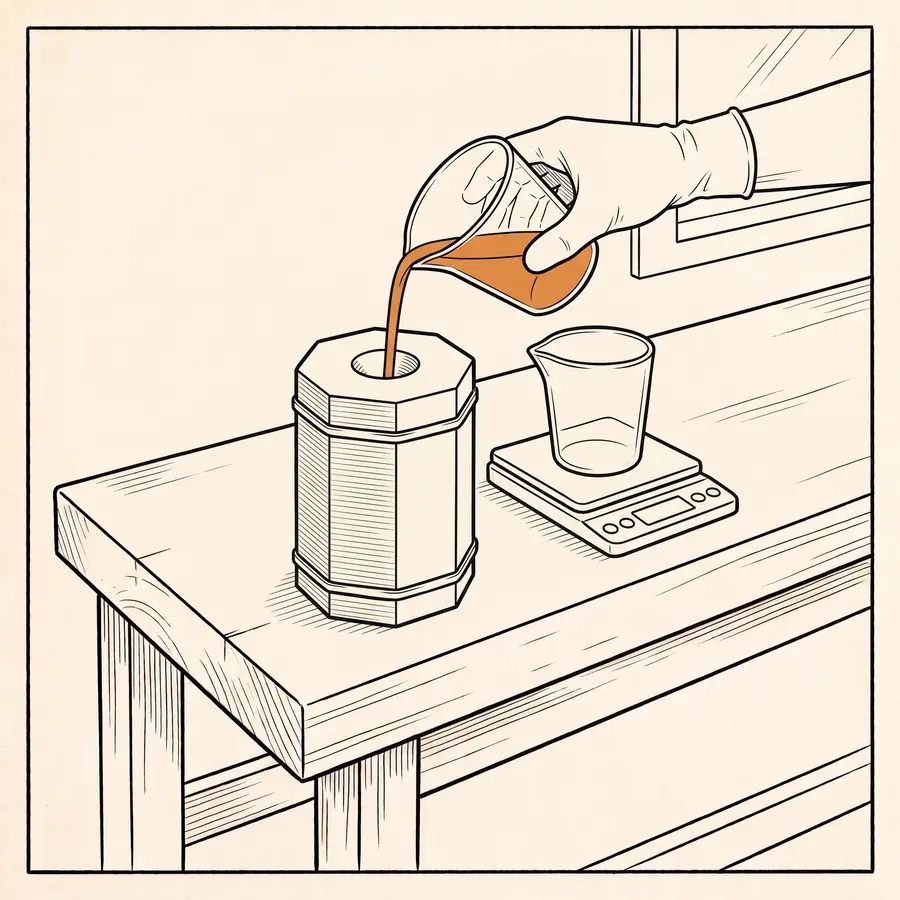
How much to mix: the quick calculator.
- Most Ecoflex and Dragon Skin grades mix 1 A : 1 B by volume or weight. [Smooth-On] The tool's Quantities panel shows part A and B for your shape. Always follow your own product's sheet.
- Mix A and B separately first, then combine, scraping sides and bottom until the colour is even. [Smooth-On]
- Work inside the pot life: 45 minutes for Ecoflex 00-30, 20 for Dragon Skin 10 Medium. [Ecoflex 00-30] [DS 10] Warmth shortens it, cold lengthens it and can stop the cure. [FAQ 136]
- Colour (the author's tip). You can buy silicone colours, made to mix into silicone, to tint the whole toy. Mix a little into part A or the combined mix until the colour is even. For a gradient, tint separate small batches and pour them in stages. For swirls, pour two colours together and stir once, lightly. This comes from the author's own casting, not from a listed source. Use a colour sold for silicone: other colorants can stop a platinum cure, and a pigment is not covered by the base silicone's certificates. Why. Run the test patch with the colour in it.
- Degas if you can. Skipping it leaves air pockets and surface flaws. [Smooth-On tutorial] The tutorial pulls about 29 inHg, lets the mix rise and fall, then runs a minute more. Thin, runny silicones may not need it. [FAQ 111]
- No vacuum chamber? Pour slowly (the author's tip). Most hobby silicone is thin enough to degas itself: the bubbles rise and pop if you give them time. Pour slowly, in a thin stream, from about 10 cm above the funnel, so the silicone stretches thin as it falls and lets the air out on the way down. Then let it flow into the funnel and find its level. Do not rush and do not stir it in the mould. The 10 cm is what the author uses, not a tested figure. This comes from the author's own casting, not from a listed source. A thick silicone traps more air, and then a vacuum chamber is worth it.
- Pour in one spot at the lowest point and let it find its level. [Smooth-On] One hobby guide adds a thin stream, to avoid bubbles. [Instructables] That last point has only a hobby source.
- A suction cup for free (the author's tip). Stop pouring a little short of the rim. The silicone cures with a shallow dip in the base face, and that dip works as a natural suction cup. This comes from the author's own casting, not from a listed source.
- A hole for a plug or a bullet. Choose a preset in the tool's Insert pin panel. The Mould downloads then carry a printed pin: a T whose arms rest on the rim of the pour opening, with a hexagonal pin hanging into the cavity. Centre it by hand before the silicone sets and pull it out after the cure. The tool warns under 4 mm of silicone round the pin and blocks a pin that comes out through the side. The preset sizes are estimates from retail listings: check yours against the plug or the vibe you own.
- A squirt tube. Pick a size in the tool's Squirt tube panel: 2 x 4 or 3 x 5 mm silicone tube, inner x outer diameter. The mould gets two channels on the parting line, a little tighter than the tube: one through the tip, one out of the back 10 mm above the base. Before you close the mould, push the tube out through the tip channel from inside one half, lay it along the cavity and out of the side hole, with a few centimetres spare at each end. Close, pour, cure. Cut the tube flush at the tip; the side end takes a syringe of lube. The tool warns under 3 mm of silicone round the tube. It works with an insert pin if the toy is thick enough: the tube then runs up the back, past the pin.
- Two hardnesses (the author's tip). Pour the soft outside with the pin in place, then do one of three things. Leave the hole open for a plug or a vibe. Or fill the hole with a firmer silicone for a firm core. Or drop the second, armless pin (6 mm shorter, printed in TPU) into the hole and cover it with more silicone, for a core that stays in. This comes from the author's own casting, not from a listed source.
Cure and demould
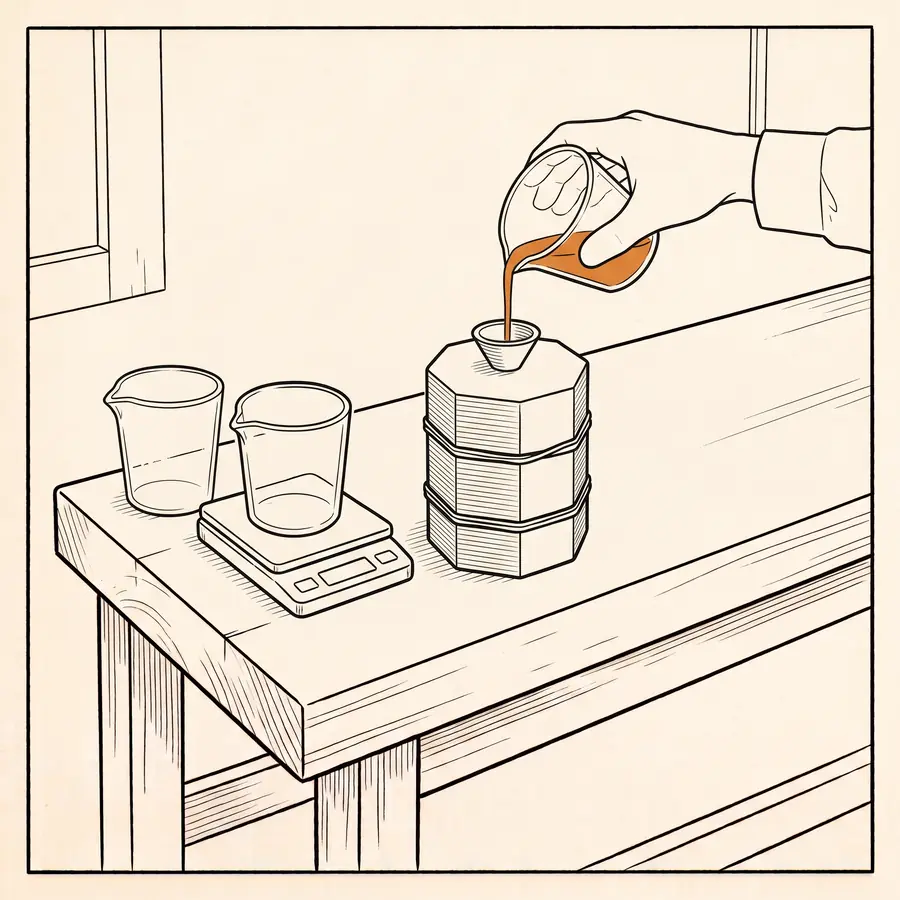
- At 23 °C Ecoflex 00-30 cures in 4 hours and Dragon Skin 10 Medium in 5. Dragon Skin 30 takes 16. [Ecoflex] [DS 10] [DS 30] Do not cure Dragon Skin 10 below 18 °C.
- Wait a day (the author's tip). The author leaves every cast 24 hours before opening the mould, longer than the datasheet asks. A full cure costs nothing and a torn cast costs the silicone.
- Let it cure fully before you pull it. Very soft grades such as Ecoflex 00-10 cure with a tacky surface. [Smooth-On]
- Opening the mould. Twist a flat screwdriver or a coin in one of the pry slots at the corners, then work round to the others. Do not lever against the cast. Why the slots.
- Soft silicone can be turned inside out without tearing (Dragon Skin 10). [Smooth-On] The tool's 5 mm radius warning is a rule of thumb about thin necks tearing when you pull; it is not from a source.
- We found no source for a heat post-cure time or temperature. Do not invent one; ask your silicone's maker.
Clean, store, use
Before you use it: safety.
- First wash (the author's tip). Wash a new cast with dish soap and warm water. It takes off the petroleum jelly, the release agent and any oil from the mould.
- Wash with liquid soap or toy cleaner and air dry. [Healthline] Health sites say silicone toys without motors can be boiled: 3 minutes [Healthline], up to 10 [WebMD]. Those apply to finished toys; for a home cast, ask your silicone's maker and use the shorter time.
- Store each toy apart. Non-silicone soft toys can melt into each other. [Healthline]
- Lube: water-based only. Silicone lube is not compatible with silicone toys. [Planned Parenthood Toronto] It can wear the surface and leave damage where bacteria live. [Healthline] One platinum-silicone maker says otherwise, so this guide takes the cautious view of the health sources.
- Anal use needs a flared base. It stops the body drawing the toy up, and without it an emergency removal may follow. [WebMD] [Planned Parenthood Toronto] The tool's For anal use box checks it. Do not shrink the base to save silicone.
- Do not switch a toy from anal to vaginal use without washing it, or without a fresh condom. [Planned Parenthood Toronto] Use plenty of lube; the anus makes none. [Planned Parenthood Toronto]
- Stop if anything hurts, tears or looks damaged. See a doctor if a toy will not come out.
Materials and links
You need: platinum silicone, mixing cups and sticks, a release agent and sealer, a vacuum chamber (optional), filament for the mould, water-based lube. Shop links on this site, when there are any, sit in boxes marked Ad. They are affiliate links: if you buy, the site may earn a commission, at no extra cost to you. Read the datasheet before buying, whatever the box says.
Learn more about silicone casting
Read on 2026-09-20; pages change. These are outside sites, not endorsements.
- Formlabs: casting silicone from 3D printed masters (manufacturer guide, from print to pour)
- Instructables: two-part silicone casting (hobby walkthrough with photos)
- Polytek: test cures for platinum silicone (how to run the test patch)
- Smooth-On: sealers and release agents (what to put on a 3D printed mould)
- Smooth-On FAQ: cure inhibition (why silicone stays sticky)
- Sinterit: finishing printed moulds for silicone (FDM, SLA and SLS compared)
Privacy and terms
- Adults only. The site asks you to confirm you are 18 or older, or of legal age where you live. It cannot check.
- Privacy. The site sets no cookies and has no accounts. Your designs stay in your browser unless you press Publish. Publishing sends the design file (the shape, its colour and its texture, nothing else) to the public gallery. The name you typed is dropped and the gallery gives the design a name of two words, like brave-chocolate; no personal data is stored. To limit abuse, Cloudflare counts publishes per connection address for a minute; the site does not keep that address. Published designs cannot be edited or removed by their author. The site saves three things in your own browser: your saved designs, your settings and the age confirmation. Clearing site data removes them. Visits are counted with Cloudflare Web Analytics, which sets no cookie and keeps no identifier for a person.
- Not for commercial use. What you make here (designs, exported files, moulds and casts) is for personal use only. You may not sell it, or use it in a product or a paid service. If you want to use it commercially, ask the author for a licence: the address is in the footer of every page. The mould files carry the same notice, engraved on one half.
- No guarantee. The tool and this guide come as they are. Shapes are checked against rules of thumb that have not been tested by a real cast yet. Nothing here is medical advice. You are responsible for materials, hygiene and use.
Sources
Read on 2026-09-20. Pages change; check the current datasheet. The full list, with what each page says and where the sources disagree, is in docs/GUIDE-SOURCES.md in the project. Health pages: WebMD (medically reviewed), Healthline (medically reviewed), Planned Parenthood Toronto. Manufacturer pages: Smooth-On, Dow, Polytek, Prusa, SSP, Mann. Retailer and hobby pages are marked as such in the text.